This guide explains how to integrate Userorbit into your website using Google Tag Manager, covering tag creation, snippet deployment, trigger configuration, and user identification via the data layer.
This guide shows you how to install the Userorbit SDK on your website using Google Tag Manager (GTM) instead of a direct npm installation.
Before You Begin
- Administrative access to your Google Tag Manager account.
- Your Userorbit Account ID from the Userorbit Admin Panel (Settings → Widget).
- Basic understanding of GTM concepts: Tags, Triggers, and Variables.
Steps
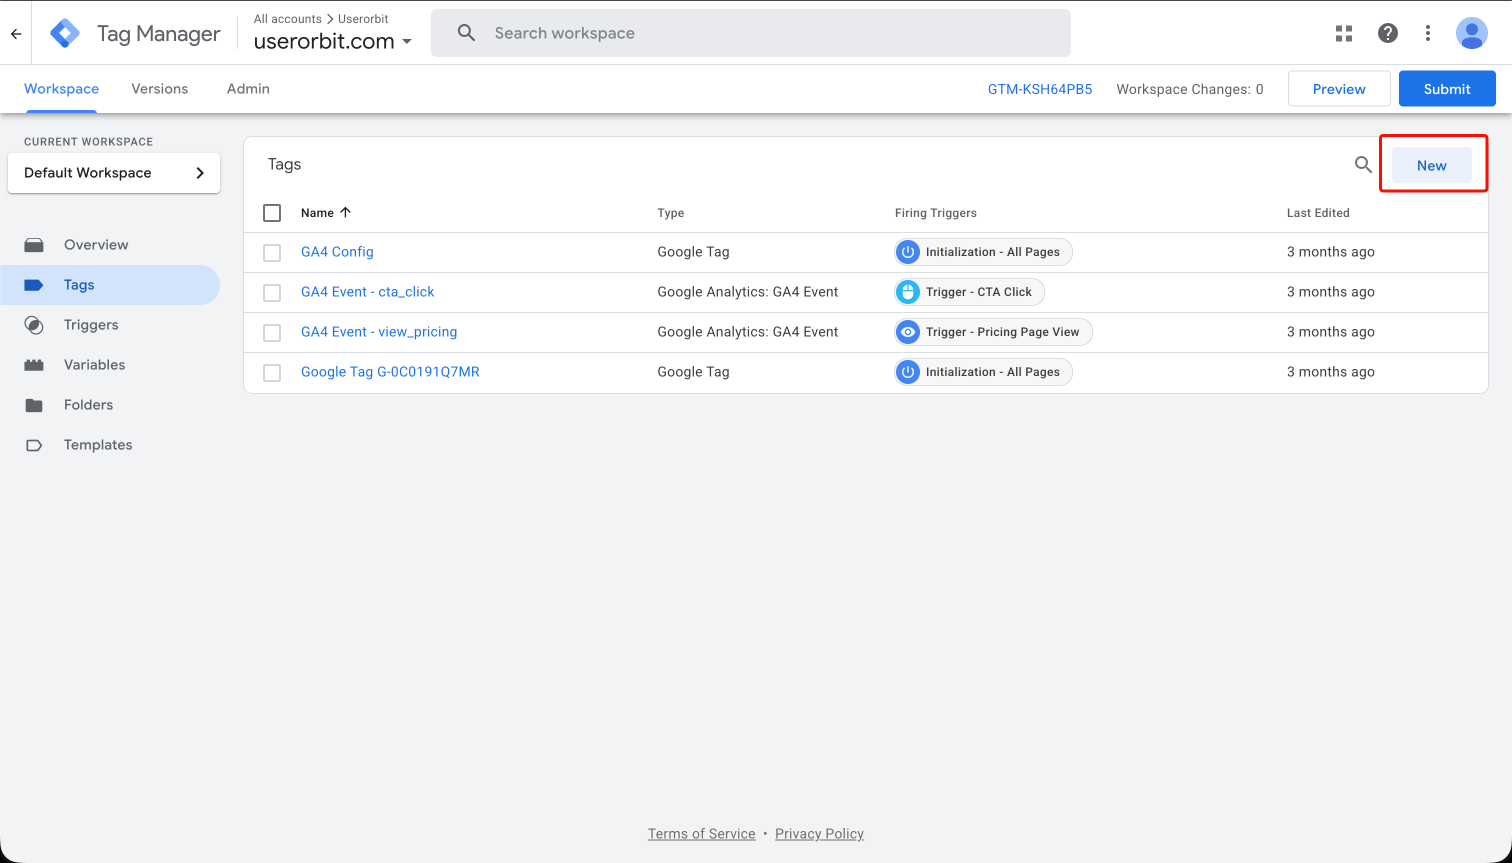
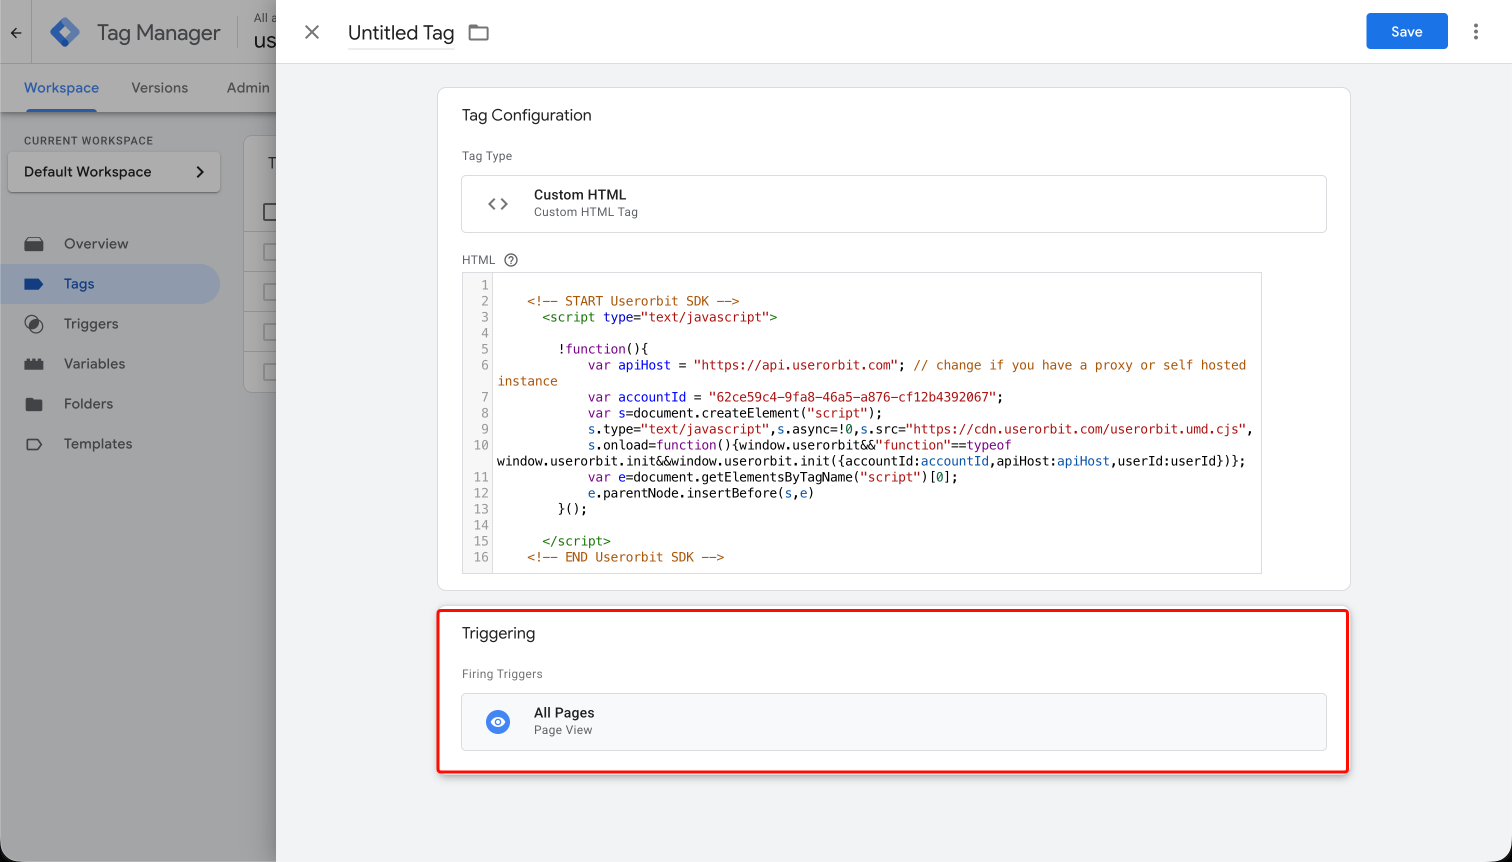
- Create a Custom HTML Tag — In your GTM container, go to Tags and click the New button in the top right corner.
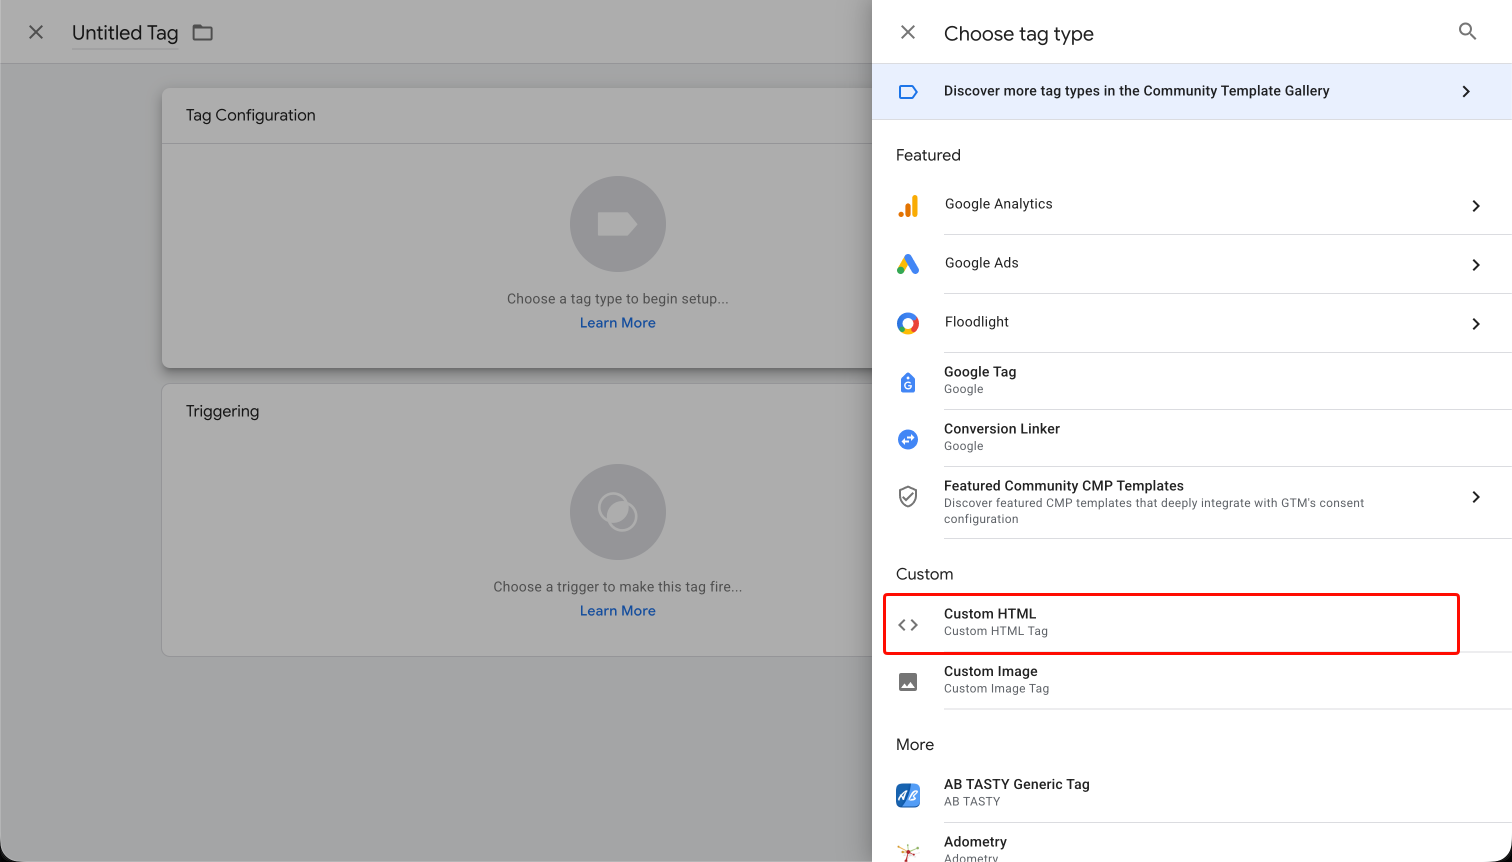
- Choose Custom HTML as the tag type — Click on Tag Configuration, then scroll down to the Custom section and select Custom HTML.
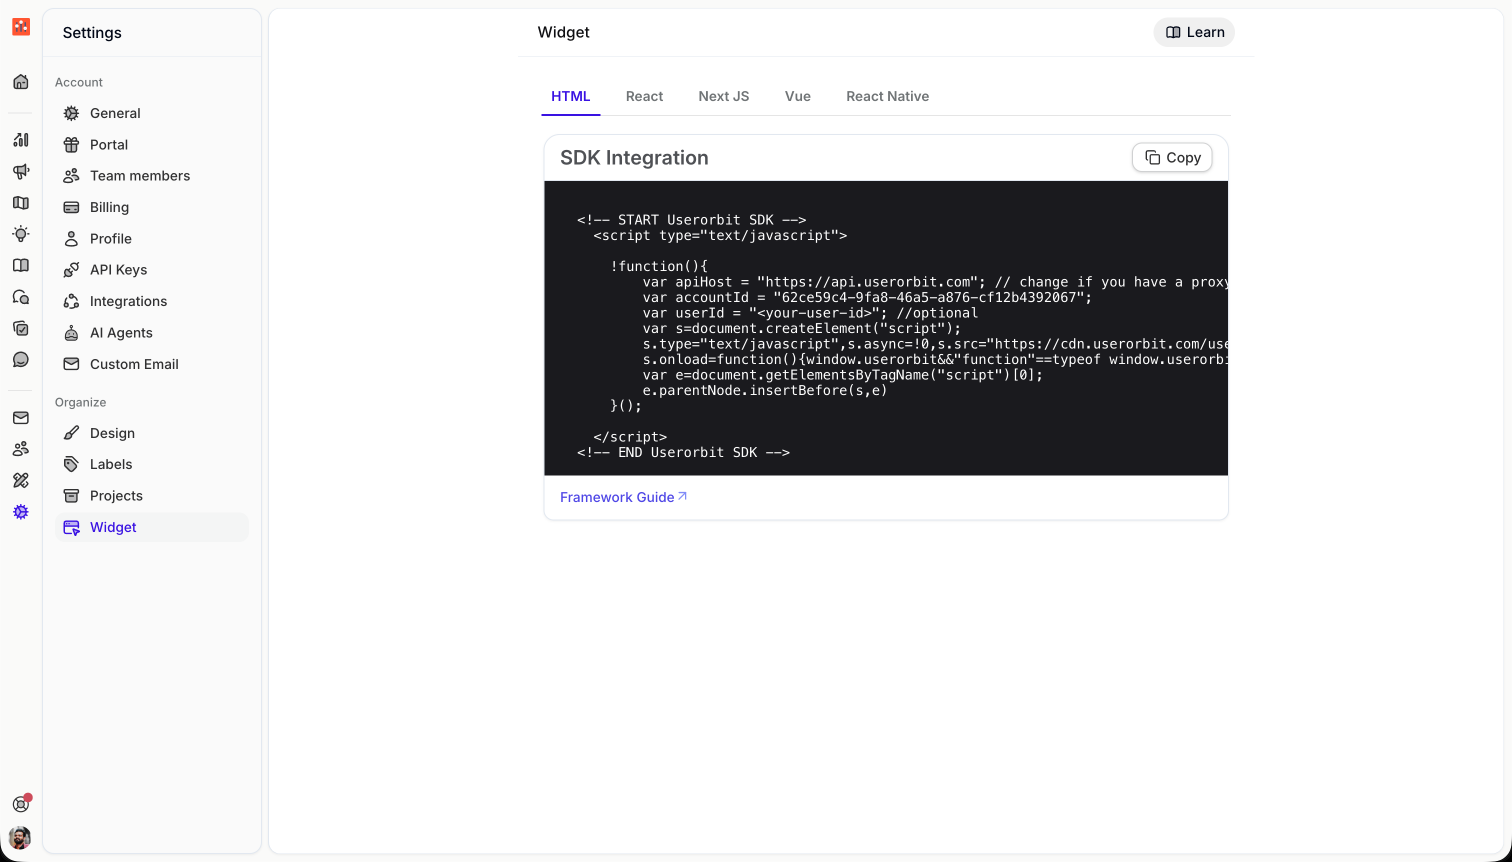
- Copy the widget snippet from Userorbit — Go to Settings → Widget in the Userorbit Admin Panel. Select the HTML tab and click Copy to copy the SDK initialization snippet.
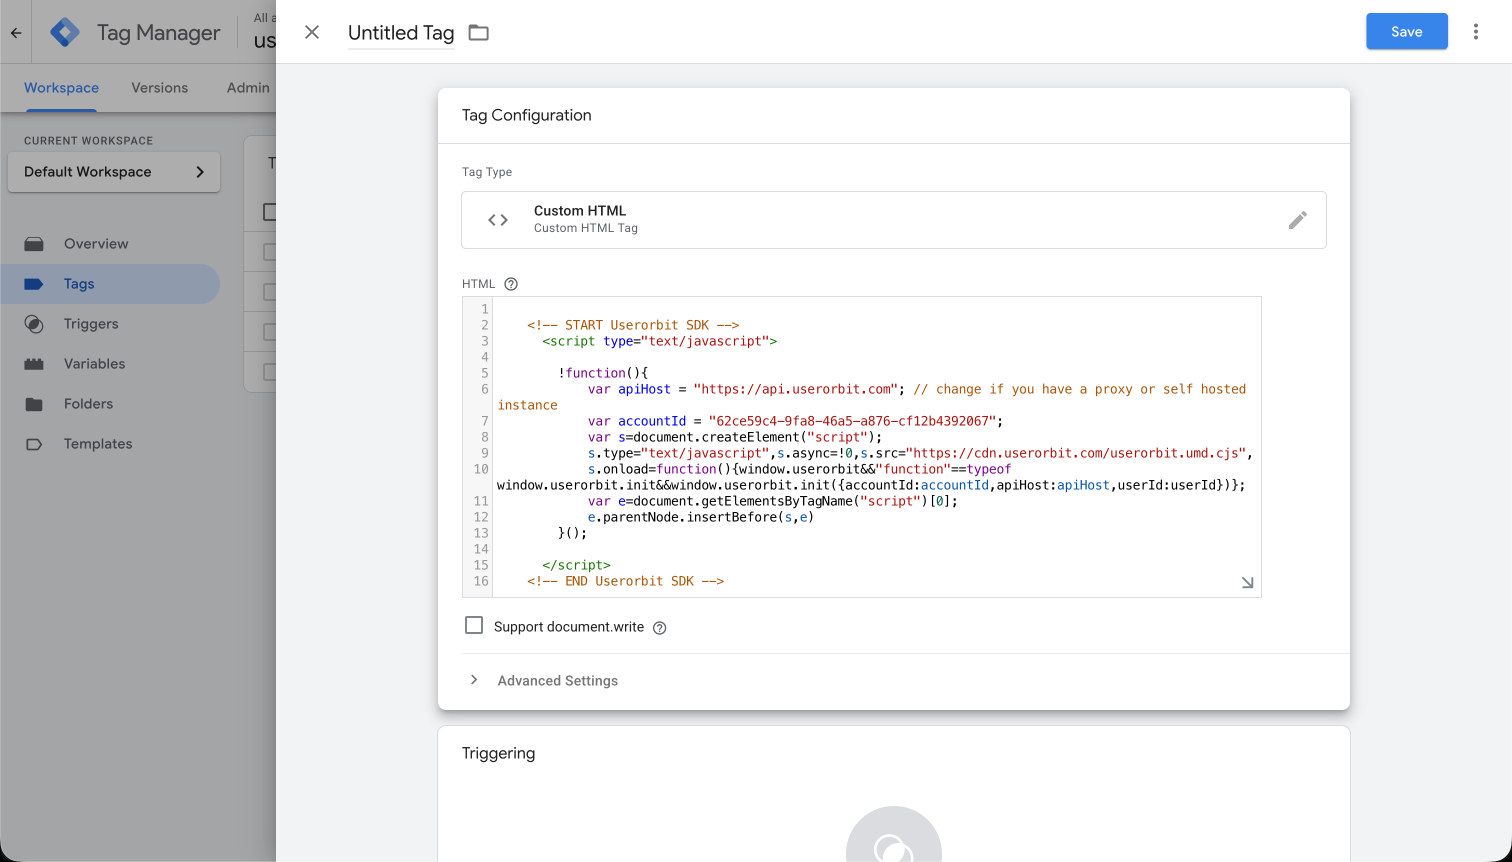
- Paste the snippet into the Custom HTML tag — Back in GTM, paste the copied snippet into the HTML field of your Custom HTML tag.
- Set the trigger to All Pages — In the Triggering section, select All Pages so the Userorbit SDK loads on every page of your site. Then click Save.
- Publish your changes — Click Submit in the top right corner of GTM to publish the container. Use Preview mode to verify the tag fires correctly before publishing.
Verify It Worked
- In GTM Preview mode, confirm the Userorbit tag fires on expected pages.
- Open your browser developer tools (F12).
- In the Network tab, filter for requests to the Userorbit API.
- In the Console, type
window.userorbitand press Enter — it should return the SDK object. - Check your Userorbit Admin Panel for incoming data.
Identifying Users (Optional)
To associate actions with a logged-in user, you can add the userId variable to the snippet. In the Userorbit Widget settings page, the snippet already includes a userId field — just replace it with the actual user ID from your application.
If your site pushes user data to the GTM Data Layer, you can create Data Layer Variables for userId, userEmail, and userName, then reference them in the snippet.
dataLayer.push({
  userId: "user-123",
  userEmail: "user@example.com",
  userName: "John Doe"
});
TypeScript
Important: When using GTM, the SDK loads asynchronously. The snippet from the Userorbit settings page handles this correctly by calling init() in the script onload handler.