Targeting ensures users see the most relevant checklist based on their profile, behavior, and context.
Targeting overview
- Properties: user or account attributes (plan, role, signup date)
- Events: actions taken in your product (invited teammate, exported data)
- Context: page URL, device type, environment
Add targeting rules
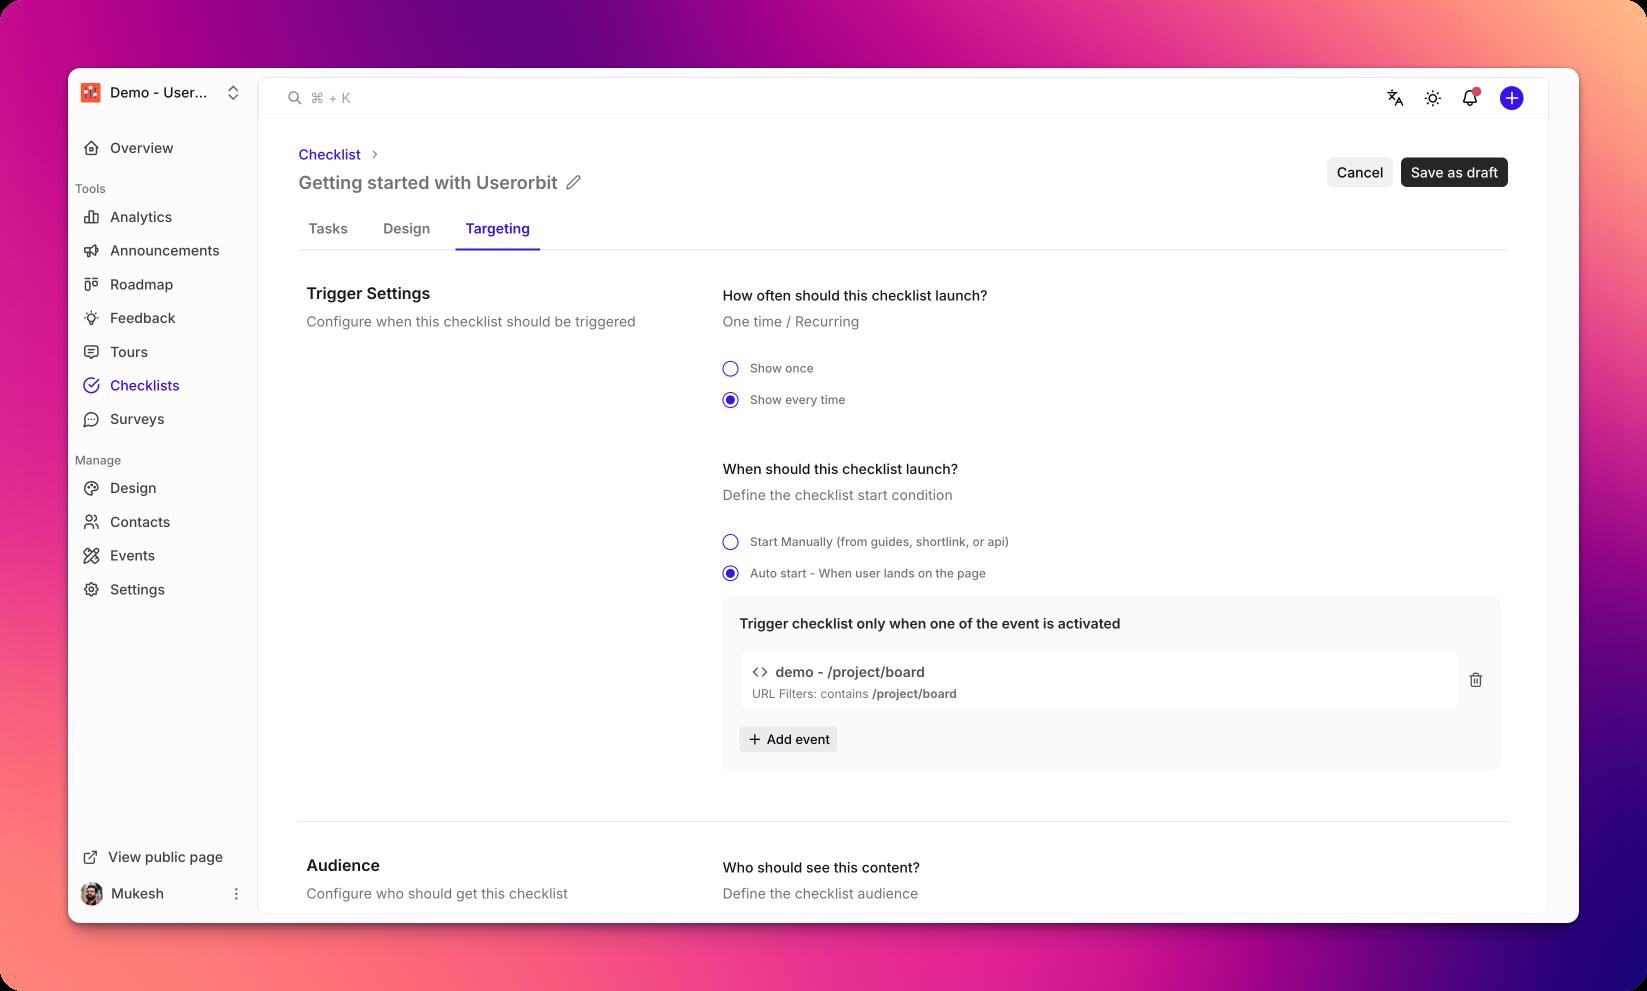
- Open a checklist and go to the Targeting tab.
- Click Add rule.
- Choose a rule type:
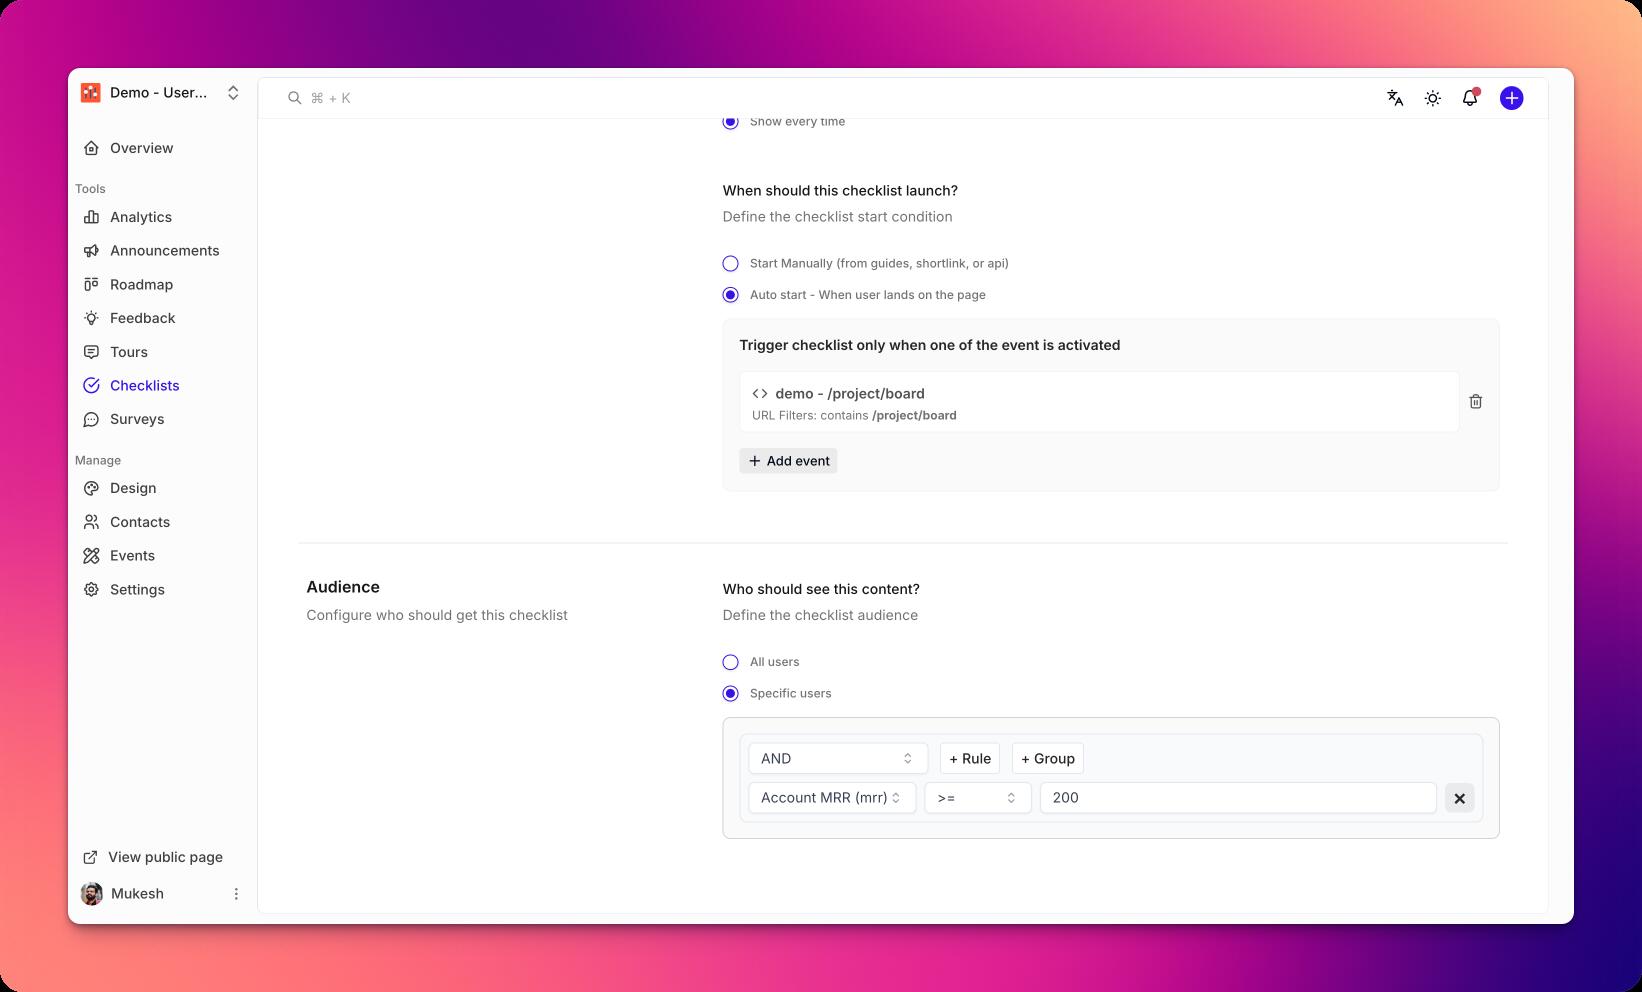
- Property rule (e.g.,
plan is Pro) - Event rule (e.g.,
has completed event Invite Teammate) - Page rule (e.g.,
url contains /settings)
- Property rule (e.g.,
- Combine multiple rules with AND/OR logic.
- Save to activate the targeting set.
Prioritization and conflicts
- Higher priority checklists will display first when multiple match
- Limit one active checklist per page for clarity
- Use exclusions to prevent overlap with other experiences
Testing targeting
- Use Preview as user to simulate properties and events.
- Navigate to target pages to validate URL rules.
- Check the debug panel for matched/blocked rules.
Best practices
- Start broad, then refine as you learn
- Prefer durable properties over transient events
- Keep targeting logic readable and documented
- Review targeting when product surfaces change
Troubleshooting
- Checklist not showing: ensure at least one rule matches and the checklist is published
- Wrong audience: review AND/OR combinations and exclusions
- Flaky matches: check event ingestion timing and property syncs