Portal SSO lets customers sign in to your Userorbit customer portal with the account they already use in your product. Use it when you want feedback, roadmap.
Portal SSO lets customers sign in to your Userorbit customer portal with the account they already use in your product. Use it when you want feedback, roadmap votes, comments, changelog interactions, and other portal activity to be tied to your own authenticated users instead of a separate Userorbit login.

When to use Portal SSO
Portal SSO is useful when your customers already have accounts in your application and you want a more seamless portal experience. After setup, users can click your SSO button, authenticate in your app, and return to Userorbit signed in as the same customer.
You can also require SSO if the portal should only allow customers who can authenticate through your product.
How the SSO flow works
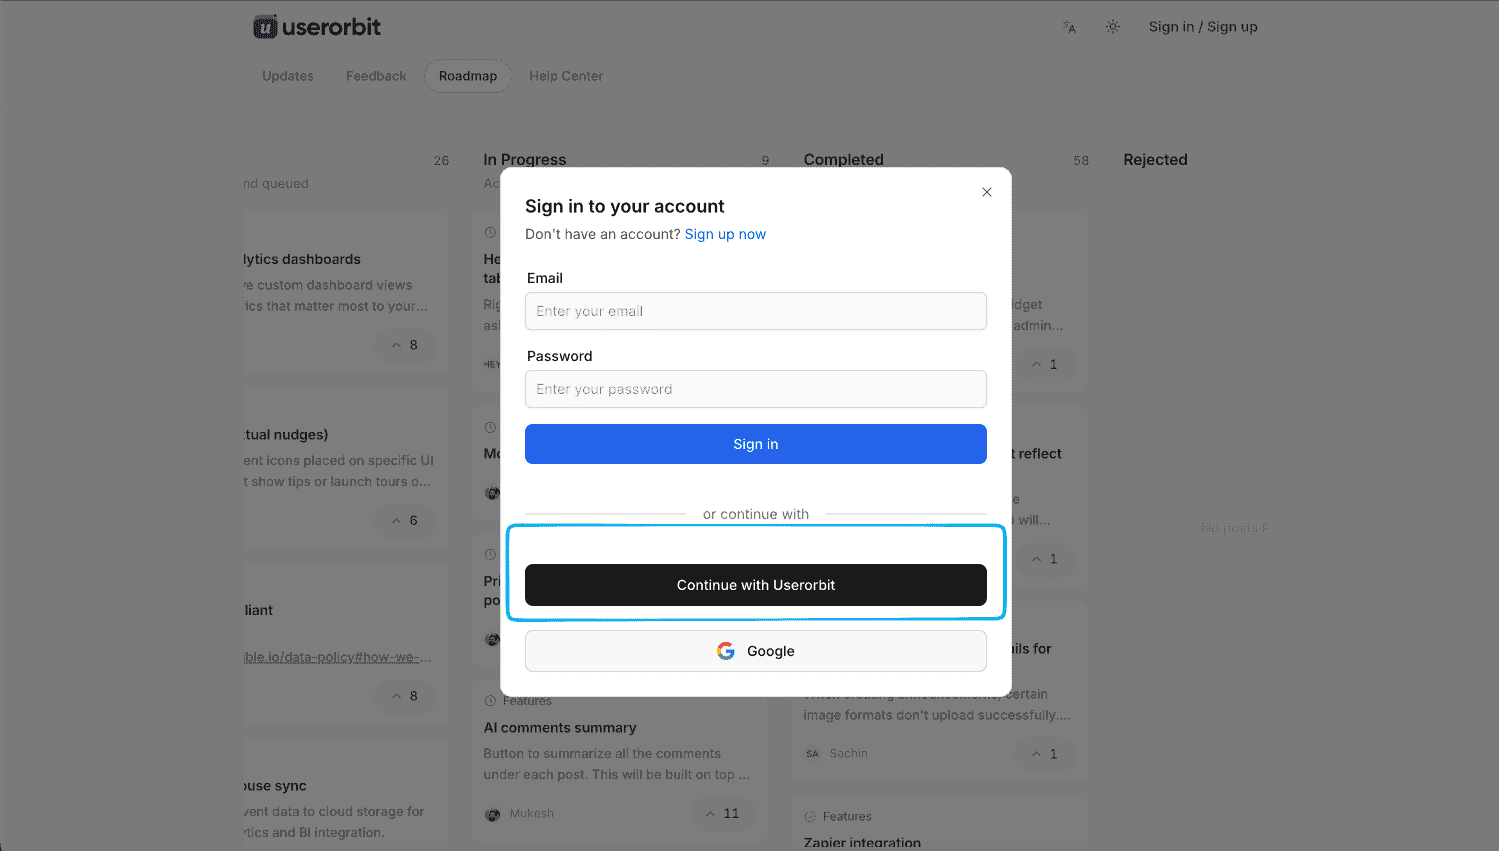
- The visitor clicks the SSO button on your Userorbit customer portal.
- Userorbit redirects the visitor to your configured SSO login URL and includes
return_toandteamIdquery parameters. - Your application authenticates the visitor using your existing login system.
- Your application signs a JWT containing the subscriber identity.
- Your application redirects the visitor to the Userorbit SSO callback URL with the JWT and original
return_tovalue. - Userorbit verifies the JWT, creates or updates the subscriber, and sends the visitor back to the original portal page.
Before you begin
- You must have access to Settings > Customer portal in Userorbit.
- Your application needs a login endpoint that can authenticate the current user.
- Your production SSO login URL must use HTTPS.
- You need your Userorbit JWT signing secret, which is generated in the Portal SSO settings.
Set up Portal SSO in Userorbit
- Open the Userorbit admin dashboard.
- Go to Settings > Customer portal.
- Find the login settings and enable Portal SSO.
- Enter your SSO login URL, for example
https://app.example.com/sso/userorbit. - Copy the JWT signing secret. Your backend will use this secret to sign the JWT sent back to Userorbit.
- Optionally update the Button label. If you leave it blank, the portal can use a default label such as Continue with SSO.
- Turn on Require SSO if you want to hide native portal signup and only allow SSO sign-in.
- Save your changes.
Build your SSO login endpoint
Your SSO login endpoint receives the visitor from Userorbit. Userorbit adds these query parameters:
return_to: the portal URL the visitor should return to after authentication.teamId: your Userorbit workspace ID.
After your application authenticates the visitor, create a JWT signed with your Userorbit JWT signing secret.
The JWT must include:
email
The JWT can also include:
idnameavatarUrlcompanyplanroleexp
Use a short expiry for SSO tokens. Five minutes or less is recommended.
Redirect back to Userorbit
After signing the JWT, redirect the visitor to the Userorbit SSO callback URL:
https://api.userorbit.com/auth/subscriber/sso.callback?teamId=TEAM_ID&jwt=JWT&return_to=RETURN_TOTypeScriptUserorbit validates the token, signs the visitor in as a subscriber, and returns them to the original portal page.
Node.js example
import jwt from "jsonwebtoken";

app.get("/sso/userorbit", requireUser, (req, res) => {
  const returnTo = String(req.query.return_to || "");
  const teamId = String(req.query.teamId || process.env.USERORBIT_TEAM_ID);

  const token = jwt.sign(
    {
      id: req.user.id,
      email: req.user.email,
      name: req.user.name,
      company: req.user.companyName,
      exp: Math.floor(Date.now() / 1000) + 60 * 5,
    },
    process.env.USERORBIT_PORTAL_SSO_SECRET,
  );

  const callbackUrl = new URL("https://api.userorbit.com/auth/subscriber/sso.callback");
  callbackUrl.searchParams.set("teamId", teamId);
  callbackUrl.searchParams.set("jwt", token);
  callbackUrl.searchParams.set("return_to", returnTo);

  res.redirect(callbackUrl.toString());
});TypeScript
Test the login flow
- Open your public Userorbit customer portal in a private browser window.
- Click the SSO login button.
- Confirm that Userorbit sends you to your application login endpoint.
- Sign in through your application.
- Confirm that you return to the original Userorbit portal page signed in as the expected subscriber.
- In Userorbit, check that the subscriber profile was created or updated with the expected email, name, and metadata.
Troubleshooting
The SSO button does not appear
Confirm that Portal SSO is enabled, the SSO login URL is saved, and the customer portal settings have been published or saved successfully.
The redirect fails before reaching your app
Check that your SSO login URL is a valid HTTP or HTTPS URL. Production URLs must use HTTPS.
Userorbit shows an invalid or expired token error
Make sure the JWT is signed with the current Userorbit JWT signing secret, includes an email claim, and has not expired. If you regenerated the secret in Userorbit, update your application environment variable before testing again.
The user returns to the wrong page
Pass the original return_to value back to the callback URL unchanged. Userorbit validates this URL against your portal domain or custom domain before redirecting.