By default, announcement broadcast emails are sent from a Userorbit address. You can configure a custom sender domain so subscribers see emails from your own.
By default, announcement broadcast emails are sent from a Userorbit address. You can configure a custom sender domain so subscribers see emails from your own domain — for example, updates@acme.com instead of a generic address.
Prerequisites
You must be a workspace owner or admin.
You need access to your domain's DNS settings (usually through your domain registrar or DNS provider like Cloudflare, Route 53, or GoDaddy).
Step 1: Open Sender Domain settings
In the Userorbit dashboard, go to Settings → Custom Email.
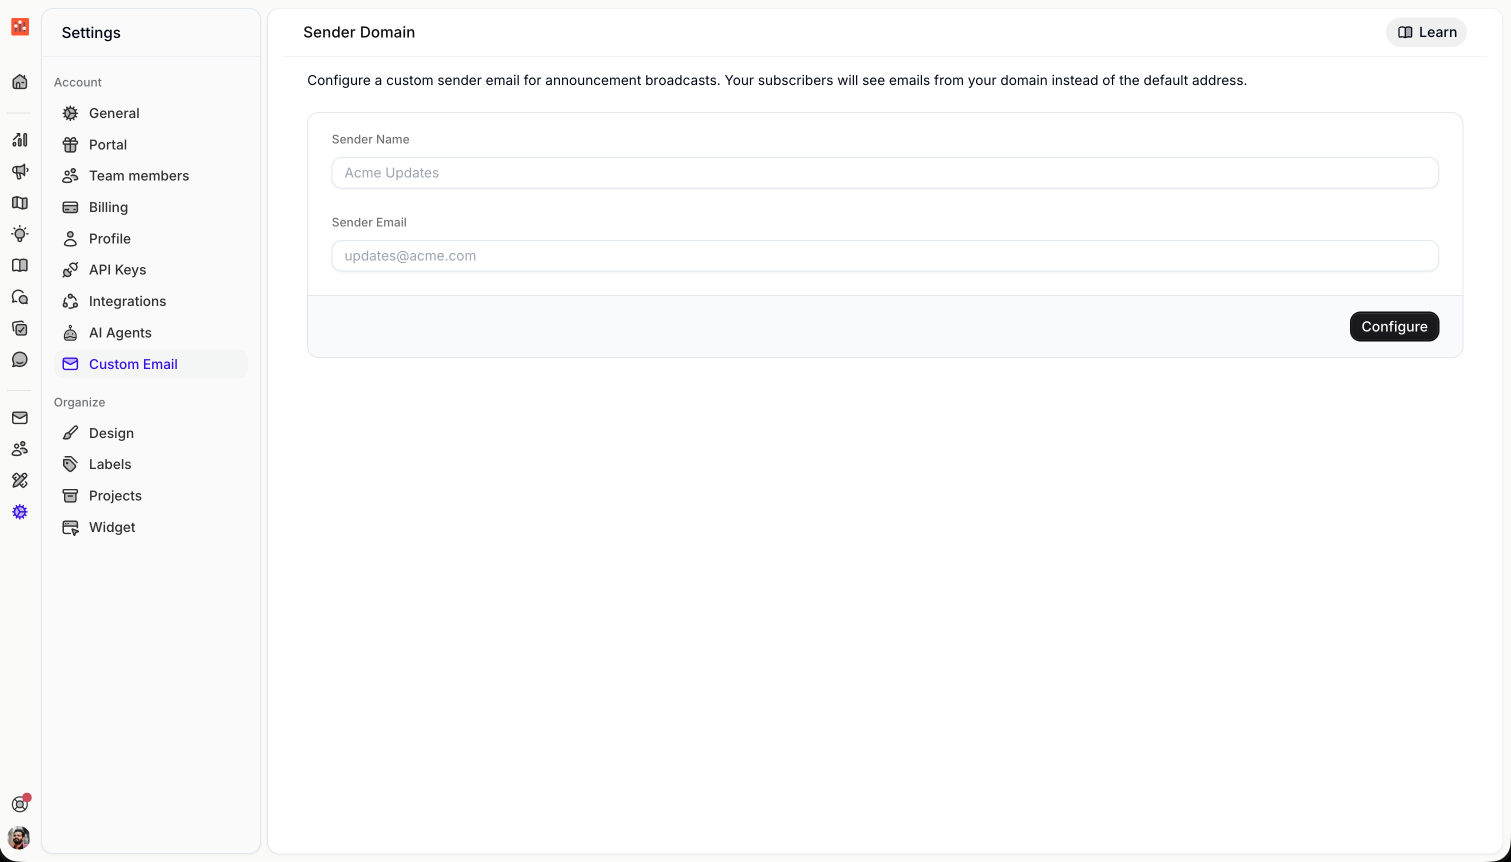
Step 2: Enter your sender details
Fill in two fields:
Sender Name — The display name recipients see (e.g. "Acme Updates").
Sender Email — The email address to send from (e.g. "updates@acme.com").
Click Configure. Userorbit extracts the domain from your email address and generates the DNS records you need to add.
Step 3: Add DNS records
After configuring, Userorbit displays a table with two DNS records:
RecordTypePurposeDKIMTXTAuthenticates that emails are genuinely sent on behalf of your domainReturn-PathCNAMEHandles email bounces correctly
For each record, copy the Name and Value using the clipboard buttons and add them to your DNS provider. The exact steps vary by provider, but generally:
Log in to your DNS provider.
Navigate to DNS management for your domain.
Create a new record with the type, name, and value shown in Userorbit.
Save the record.
We also recommend adding a DMARC TXT record if you don't already have one. Set the name to _dmarc.yourdomain.com and the value to v=DMARC1; p=none. DMARC helps email providers trust your domain and improves deliverability.
Step 4: Verify your DNS
DNS changes can take anywhere from a few minutes to 48 hours to propagate. Once you've added the records, return to Settings → Custom Email and click Verify DNS.
Userorbit checks each record and shows its status:
Verified (green) — The record is correctly configured.
Pending (yellow) — The record hasn't been detected yet. Wait for DNS propagation and try again.
When both DKIM and Return-Path records are verified, the overall status changes to Verified and all future announcement broadcast emails will be sent from your custom address.
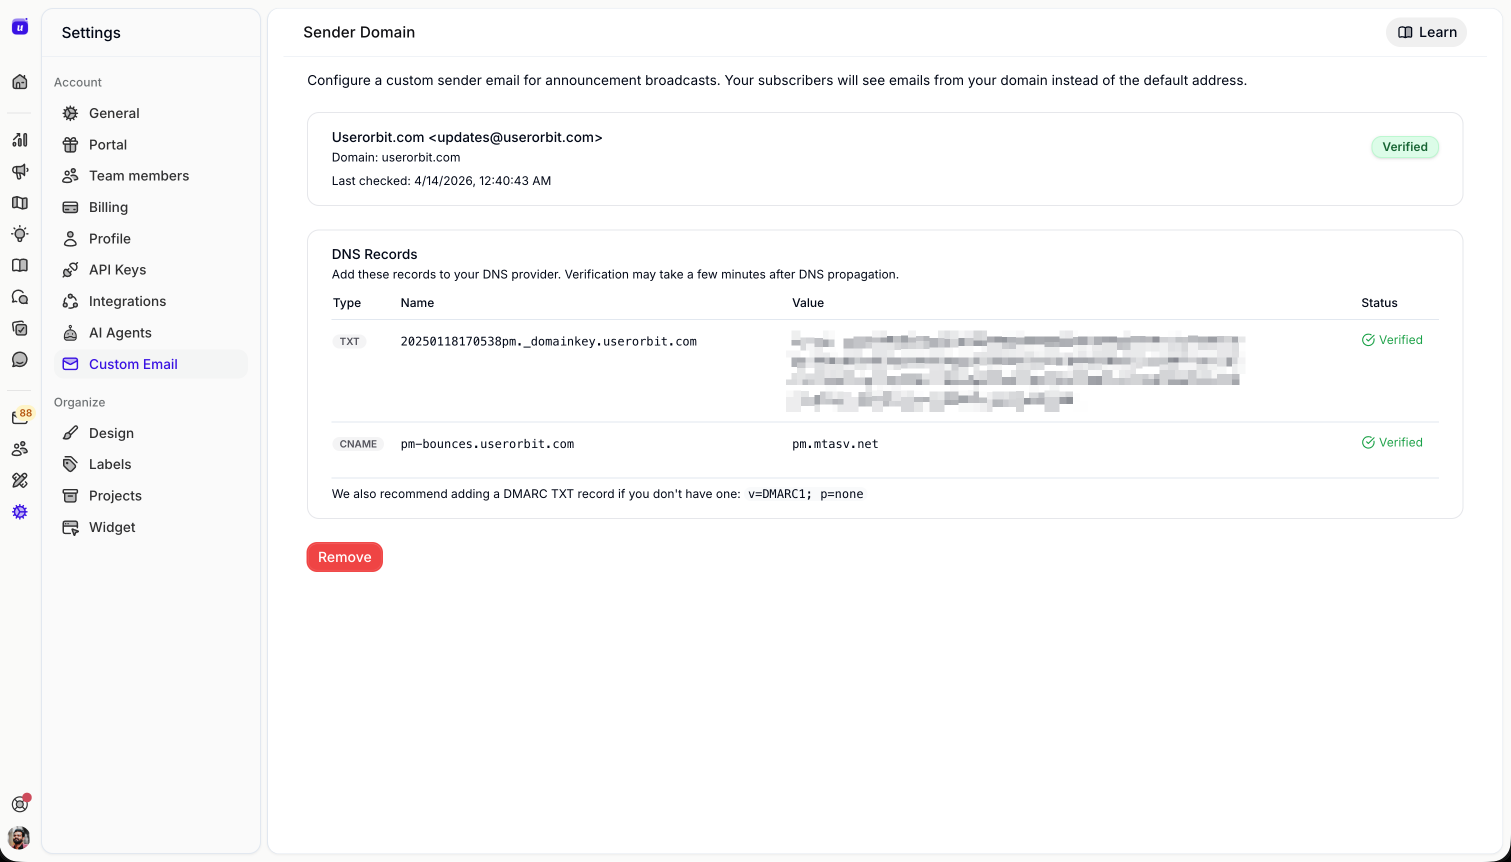
Removing a custom sender domain
To stop using your custom domain and revert to the default Userorbit sender, click the Remove button on the Custom Email settings page. Broadcasts will immediately use the default sender address.
Troubleshooting
Verification stays pending — Double-check that you copied the record name and value exactly. Some DNS providers require you to omit the root domain from the record name (e.g. use
selector._domainkeyinstead ofselector._domainkey.acme.com).Verification failed — Check the error message shown below your domain configuration. The most common cause is a typo in the DNS record value.
Emails still showing old sender — Make sure the status is "Verified". If you just verified, send a test announcement to confirm the new sender appears.