Userorbit lets you add multiple languages to a product tour so visitors can experience the same walkthrough in their preferred language. Add the languages.
Userorbit lets you add multiple languages to a product tour so visitors can experience the same walkthrough in their preferred language. Add the languages from the tour editor, then translate each step for the languages you want to support.
Before you start
Open the product tour you want to translate.
Make sure the tour already has the steps you want to show users.
Step 1: Open the tour settings
In the product tour editor, use the settings button in the bottom-right corner of the editor toolbar. This opens the settings panel for the current tour.
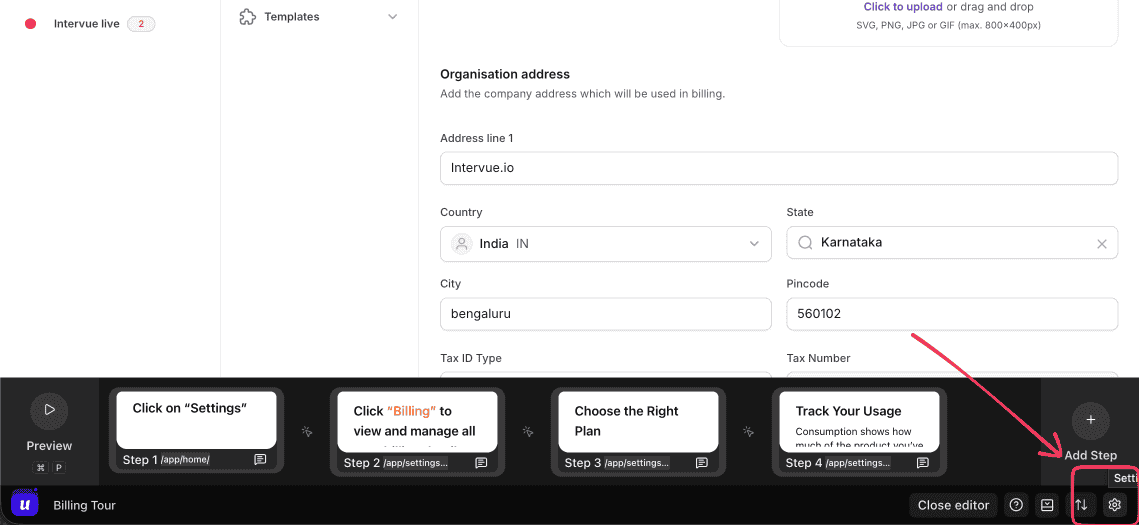
Step 2: Add another language
In Tour settings, find the Languages section. English is available by default. Click the + button beside Languages to add another language to the tour.
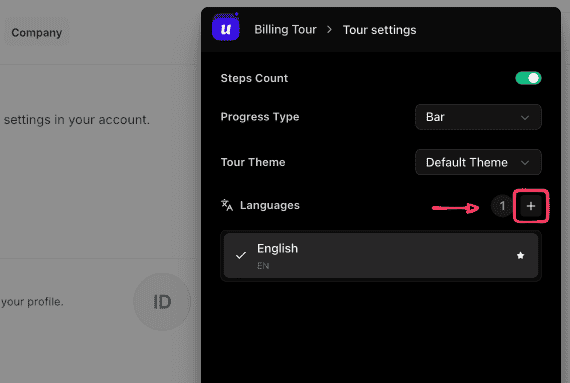
Step 3: Choose the language
Select the language you want to support from the dropdown. The selected language is added to the tour language list.
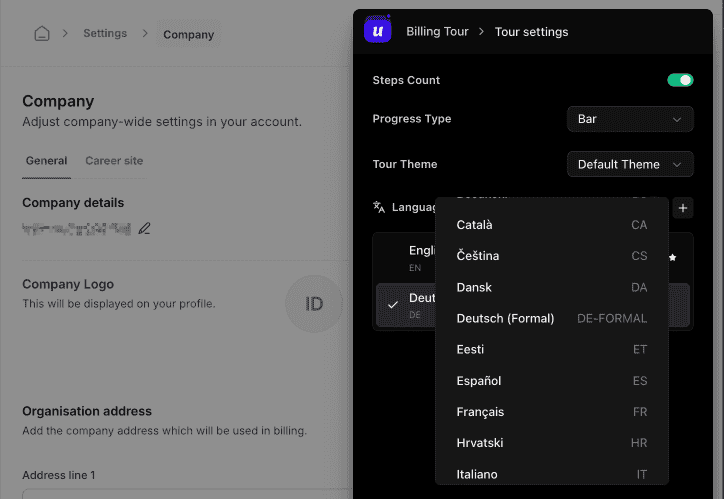
Step 4: Translate the tour content
After adding a language, switch to that language from the language selector in the editor toolbar. You can manually edit the text in each step, or click the Auto translate tour button to generate translated content for the selected language.
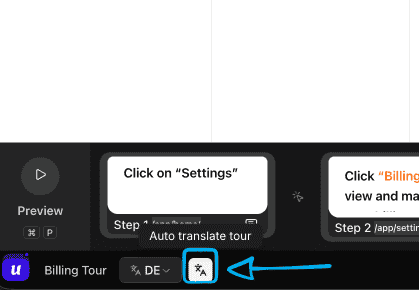
Step 5: Preview and publish
Preview the tour in each language to confirm the copy fits inside each step and the flow still works as expected. Once everything looks correct, publish or update the tour.
What users will see
When multilingual support is enabled, users can view the product tour in the languages you added. This helps teams deliver onboarding and feature walkthroughs to customers across different regions.